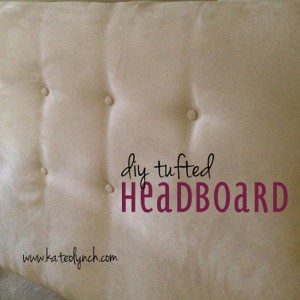
Back in January I picked out some fabric with the plan to make a headboard for my new guest room. Then the fabric just sat in the corner waiting to be used. I was a little intimidated by the project so I decided to procrastinate. But now that I’ve completed this project let me tell you, a DIY Tufted Headboard is not that hard to make at all!
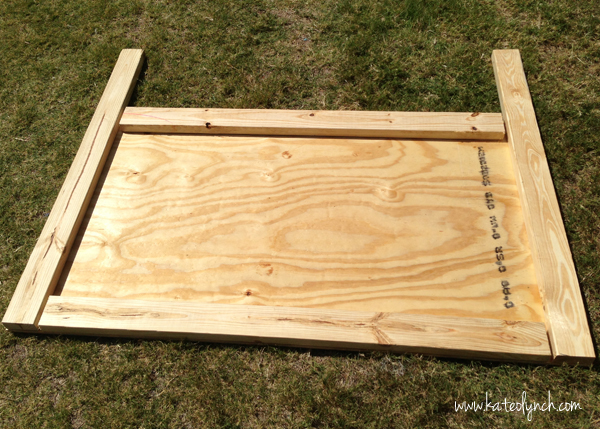
First I measured the bed, which was 54 inches. You want to add 2 inches to that width on either side and this is the width of your headboard. So I was making a 58 inch wide headboard. Next I had to determine how high I wanted the headboard to be, and I decided I only wanted the headboard to be 1o inches taller than the bed. When the very nice man at Home Depot asked me what size I needed my sheet of plywood to be I told him 33 inches by 58 inches. FYI did you know that you can get wood cut for free at Home Depot? I didn’t know this but it made my day and this project so much easier.
 I left Home Depot with the following items for my DIY Tufted Headboard (Full size):
1 sheet of plywood cut to 58″ x 33″
2 2x4s with a length of 96″
1/2 nails
Sounds easy enough doesn’t it? Once we were ready to get started, I say we because my awesome sis-in-law helped me out on this project, we laid out the wood to figure out how to cut the 2x4s. I have no idea why they are called 2x4s because they aren’t actually 4 inches wide. Know how I discovered this? We decided to cut a 50 inch section from each 2×4 thinking if they were 4″ wide then we would perfectly frame the sheet of plywood.
Wrong! As you can see above cutting 50 inch sections and placing the remaining portion 2x4s next to them left small gaps, but we carried on. After the 2x4s had been cut I decided to just attach the remaining pieces to the plywood as they were to serve as legs. This made the headboard 46″ tall. At this point you could but another piece of plywood over the back but we decided there was no reason to do that.
Next, because I knew I wanted a tufted headboard, I measured out where all the buttons would go so we could pre-drill the holes.
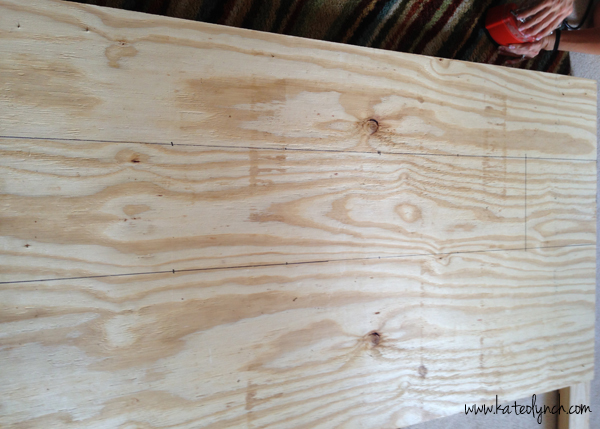
I started out drawing a line from one end to the other, so when I got to the vertical lines I decided to skip that step. I didn’t want that many buttons on the headboard so I decided to do 5 buttons across and 2 rows spacing them 9 inches apart. Once I had measured out all of the locations for the buttons, Tiffany drilled the holes.
Now it was time for the foam. I did not take a picture of this because, to be completely honest, it looked awful. I bought inch and a half thick foam that was designed to lay on top of a bed as padding rather than getting a sheet of foam. It was definitely the cheaper way to go and wasn’t bad, but it probably would have been better had I bought a sheet of foam. We stapled the foam to the front of the headboard but you could use spray adhesive.
The next step of the DIY headboard was to wrap it in batting which we stapled to the back of the headboard. This helps to soften the edges of the wood and to help smooth out the bumps caused by the foam since it had been rolled up and stuffed into a bag.
Then it was time for the fabric! I had it pretty easy since my fabric didn’t have a pattern but I still wanted it to look good. We started attaching it in the middle on the top and work our way to one side then the next. Once it was all the way wrapped it was time to make buttons. I bought button kits at Walmart and used left over fabric to create buttons. This was really easy because they come with instructions. My fabric is kind of thick so that did make it a little challenging to make the buttons.
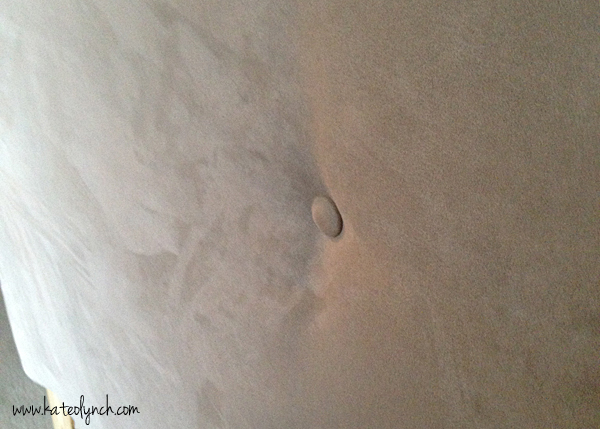
Because we had pre-drilled the holes attaching the buttons was easy. I tied knots in the string and then stapled above the knots to anchor the thread. I bought long upholstery needles for this project that were easy to feed through the hole and push through the foam, batting and fabric. Once the needle was through we fed it through the button loop and back into the headboard. Once the needle was through we tied it to the thread anchored to the back a few times and viola, the buttons were attached.
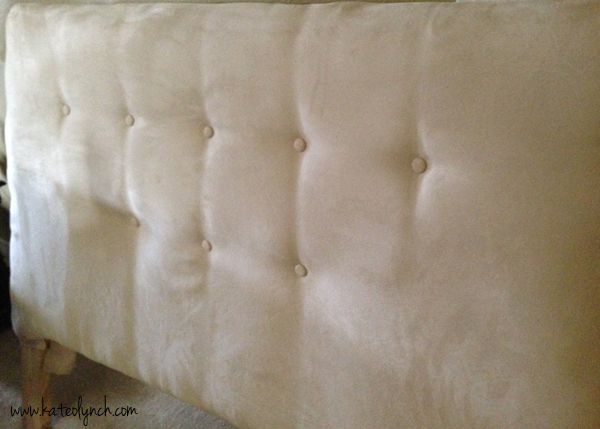
At this stage, I was in love! I couldn’t believe how great it turned out. Before adding the buttons I was a little nervous because the fabric looked a little bumpy thanks to that crazy foam I bought. I took the headboard home and was so anxious to see it in place that I immediately carried it up to the guest room.
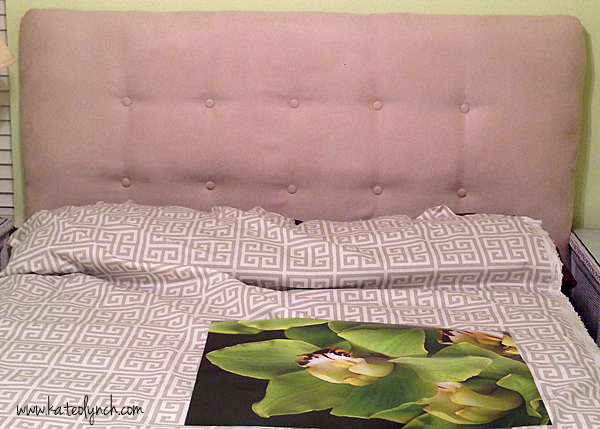
This gives you a sneak peek into a few other projects I’ll be blogging about as I finish up my guest room make over. All in all I made this DIY headboard for under $100.
Have you made a headboard? Or are you anxious to make a DIY tufted Headboard? What’s holding you back?

[…] up was making the headboard. I blogged all about how I made the tufted headboard here a little while […]